Candy table setup
How to Set Up a Candy Buffet Table
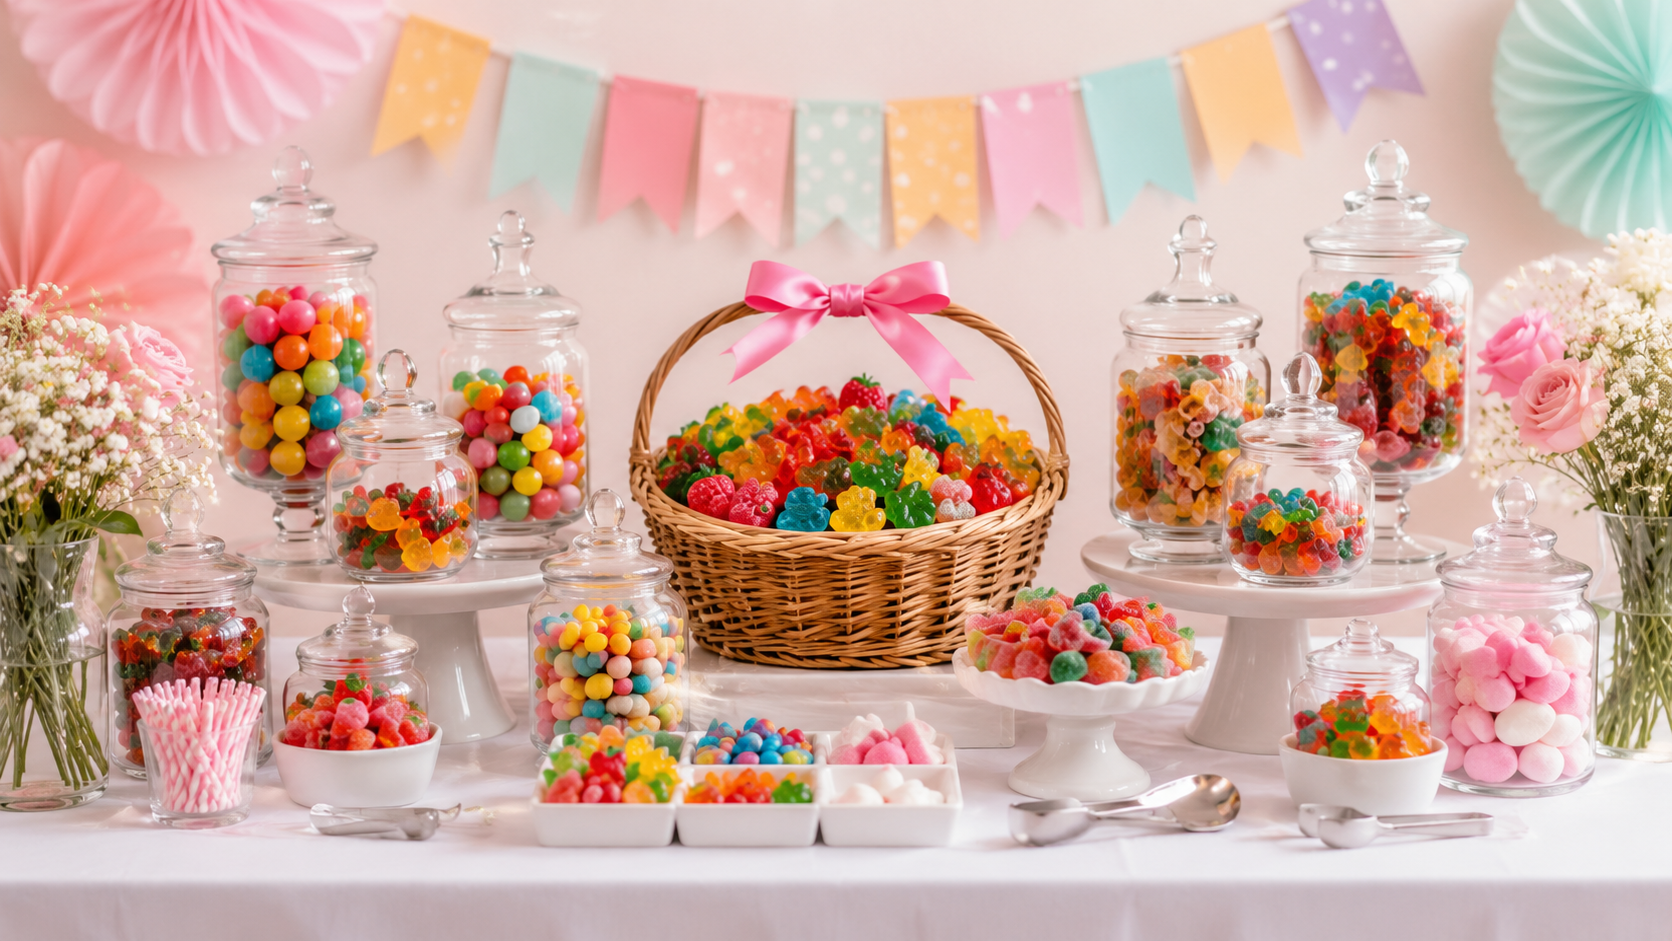
A good candy buffet table is not just about buying candy. The layout, container sizes, scoops, labels, colors, and refill plan all help the table look polished from the first guest to the last.
Start with the table layout
Use a simple three-level layout. Put tall jars and decorations in the back, medium containers in the middle, and low bowls or trays in the front. This makes the table easier to see and helps every candy choice feel intentional.
Basic setup checklist
| Item | Why it helps |
|---|---|
| Tablecloth or runner | Creates a clean base and hides extra candy boxes underneath. |
| Jars and bowls | Separate candy varieties and make the display look full. |
| Scoops or tongs | Make serving easier and cleaner. |
| Favor bags or cups | Give guests a clear way to take candy from the table. |
| Small labels | Help identify sour, sweet, chewy, or themed candies. |
Choose a color palette
Pick two to four main colors before buying candy. A rainbow table can work, but a planned palette usually looks more polished. Pink, yellow, mint, and white feel soft and party-friendly. Pink, orange, teal, and yellow feel bright and playful.
How much candy to put out
You do not have to display every pound of candy at once. Fill containers enough that they look generous, then keep refill bags behind the table. This makes the setup easier to manage and keeps the table from looking messy.
Container placement tips
- Place the tallest jars in the back corners or center back.
- Use cake stands or boxes under a tablecloth to create height.
- Keep scoops near the candies they belong to.
- Use low bowls for gummies that guests will scoop often.
- Leave enough empty space so the table does not look crowded.
Finishing touches
Add a small sign, ribbon, bunting, paper fans, flowers, or confetti in the same color family. Keep decorations around the candy instead of covering the serving area. The candy should still be the main focus.